Thursday, January 30, 2014

Rising Star Coffee Workshop

Last Saturday, I was lucky enough to have a spot in a coffee workshop held at The Brew Mentor. I had long been awaiting this moment - for about 5 weeks to be exact. I had a countdown on my calendar and every night before I went to bed I would tell Mike how many days left until the day. Some people say "I love you", my night time ritual went more like this: "Ahhh 17 more days until our coffee workshop! I'm so excited, I'm so excited, I'm so excited!" Poor Mike.


Our spoils from the day. 1/2 pound of each green coffee bean they had to offer!

So the day finally came and off we went to learn for the best, Rising Star of course! The owner, Kim Jenkins, was there to go over any and all things that related to getting to know coffee on a more intimate level. He described his trips to the coffee farms all over the world, where they sourced their coffee from, and the amount of care and specifics that go into choosing a coffee that fit their needs. No wonder the stuff is so damn good.


Here are all the different beans. Each on has a different size, shape, and smell - so much discovering to be done!


See! Look at the tiny Ethiopian Yirgacheffe beans on the far left...and then check out the size of the Panamanian ones in the upper center. Whoa.

There was tons that I learned in the 2 hour session, but I put together the top 3 things that can change your home coffee experience. Now sit patiently while I tell you.


Darwin's ready! Gosh he's handsome.

1. Your grinder matters.
       A good grinder is key to a good cup of coffee. Your grinder gives your coffee grounds their unique particle size, and consistency is what you want. A mill grinder chops the beans with a spinning blade, and just can't produce the consistency needed for extraction (pour overs, drip coffee, etc). A burr grinder has two metal plates that grind the coffee, the blades can move closer or farther depending on the size of grind you want, and it excels at a uniform grind.

Here is a semi-exaggerated visual on the difference the two: A mill grinder = dropping a hershey's chocolate bar on the ground and looking at the pieces, a burr grinder = breaking the little individual squares of a hershey's chocolate bar and looking at the pieces. Which will be more consistent? Burr grinder for the win! 

As I was whispering to Mike that we needed to buy the burr grinder immediately, he whispered back "beat ya to it" and showed me the checkout screen at amazon. Love that man. He picked the one they were using, the Baratza Encore Burr Grinder.

What a beaut'. . You set the grind by turning the top so the plastic notch aligns with a tick mark (you can see ours is set to 20 if you look real close). The higher the number, the larger the grind.

The inside of the grinder - looks smashing! Hah, pun.

And here you can see how it works; the blades will spin and the beans fall in, and then they are crushed to the indicated size.

And you only have to worry about an on and off switch, couldn't get much easier!


2. Roasting at home can be as easy as turning on an air popcorn popper.
    Literally. That's it! The general criteria is you want a air popcorn popper that has air vents in the base. The vents will shoot hot air out and push the beans around. High heat and constant movement are how you get roasted coffee. The amount of heat your air popcorn popped puts out will matter, which Mike and I found out after a few failed attempts. The one I have here is not one I would recommend because we had multiple failed attempts. But we found a better one the other day that has worked - called the Nostalgia. We found it at a Big Lots for $20...not too shabby!


Here is the first air popcorn popper we tried, the Salton. I wouldn't recommend it, we haven't been able to get anything to roast in this one. We think it doesn't get hot enough, because we never can reach first crack in it.

What you want to look for are those little vents near the bottom. The vents push the hot air out and help the beans spin, which help them roast evenly. Each air popcorn popper will be different, so definitely open it up before you buy it!


3. You are the biggest variable in every cup of coffee.
    Yep, you read that right. How are you feeling? When did you brush your teeth? What toothpaste did you use? What did you do last night? And so on. All of these things will make your cup of coffee taste different, so cut yourself some slack when roasting. You can make it as simple or as scientifically focused as you want, but just keep in mind that there are endless variables that can be altered, and it's supposed to be fun! Find what taste you like best and stay true to that! It's not worth it if you don't enjoy it :).


Here's the grinder in action!


And the final result looks like this! Evenly ground coffee, at last!


Sunday, January 19, 2014

Homemade Gluten-Free Flour Guide

The other day I had cornbread on my mind. Let's go ahead and blame it on Mike since he was making his infamous taco chili soup. Wait, now that I type that...is that redundant? Does chili imply that it's a sort of stew or soup of it's own? Hmmm. Anyways, what goes better with chili than cornbread? Nothing. You're right, per usual. Y'all are good!

So off I went to the google machine to peruse cornbread recipes so I could make one of my own. There were a few good ideas out there, but all of them had one or two ingredients that I didn't currently have in the house, and I'm just not one to run to the store for one ingredient.

That's where my guessing and hoping for the best comes in. That's also where all of my "you probably don't want to taste that" recipes come from...but no risk, no reward, right? Good news is this one was a reward. Bad news is I didn't whip out the camera because I was in a rush to make it before the taco chili was done...Mike bet I couldn't do it in time and I'm kinda competitive. Situations like this cloud my judgement I think.

The ingredients that I didn't have was a gluten-free flour blend, which is what most of the recipes for gluten-free cornbread called for. With a little bit more googling, I now can make a gluten-free flour blend for anything!

Found this picture while googling since I had none of my own - and also found lots of interesting info! It's the Flour Advisory Bureau ...who knew there was one of those?

Here's how easy it is to make your own:

All you need a 40/60 ratio of whole grain to starches/white flours.
That means 40% whole grains, 60% starches/white flours. Your options for each are as follows:

Whole Grains:
- Teff Flour
- Sweet Potato Flour
- Sorghum Flour
- Quinoa Flour
- Millet Flour
- Oat Flour
- Mesquite Flour
- Corn Flour
- Buckwheat Flour
- Brown Rice Flour

Starches/White Flours:
- White Rice Flour
- Tapioca Flour
- Sweet Rice Flour
- Potato Starch
- Cornstarch
- Arrowroot Flour

*Assume that there are 140 grams in 1 cup of all purpose baking flour. That means you need 56g of whole grains, and 84g of starches/white flours. A scale helps. I use this scale which I bought on Amazon.

And then mix the two that you choose together and there you have it! Use this as your general guide to a gluten-free flour base and you should be good to go. Some mixtures will respond differently due to water absorption, but I haven't tried them all yet, so play around and find what you like best.

That being said if a recipe specifically says something along the lines of "make sure to use these", or "do not substitute", I would heed those suggestions because they have probably done their homework and know a thing or two about baking.

Now get to replacin'!!

Monday, January 13, 2014

Reclaimed Wood

I have come to realize that reclaimed wood has a special place in my heart. Some people find peace going for a walk with their dog and listening to nature. Others go grocery shopping and fill a cart of all the things they find most delicious, and then leave it behind because they don't really want to buy them. And then there is the relaxing type, who want a glass of wine and a hot bath (or sauna) and a magazine full of things they have a love-hate relationship with.

Ok confession, those are all things I love doing. Yikes, thanks for visiting crazy town with me.

But where I feel MOST at peace, is definitely while in the same room as reclaimed wood. Preferably it wouldn't be reclaimed yet, it would still be in the same barn it came from. Because that would mean I achieved one of my life long goals of living on a farm with a barn full of horses - standing in said barn built long ago, full of wood that is just to beautiful to give up.

But since I'm not there yet, I'm allowing my vision to be flexible, and doing what works for me right now. And that is reclaimed wood in my house. The house is slowly but surely coming along, and the other night we got to see the beams that went up. Wanna see?! Ok yes.

 So much detail! So many crevices for my eyes to get lost in! I can only imagine the stories this wood could tell. 


In addition to those beams - Mike and I went to a furniture show and found my new favorite furniture designer, Play-Haus Design. He uses all metal and wood from barns and factories in Ohio. If you live in the Cleveland area, you are a lucky dog.

Here's the sexy little number I went home with that night...and no I'm not talking about Mike.


It's going to look SO perfect in our house! Can you sense the theme yet? Next up is to get the painting finished and then the kitchen is going in...I can't wait, I can't wait, I can't wait. But really, I can't, so hurry up house. Please :).

Friday, January 10, 2014

Bacon Biscuits


So I've been on a baking kick lately due to the obnoxiously cold temperatures, but you wouldn't know about that because I've been too much of a baby to go out to my car and retrieve my camera. The store wasn't open for me to go to work and Darwin looked at me like I was crazy when I opened the door to let him outside - so I followed suit and refused to walk outside to get my camera.

In my defense, my car is like 30 feet away, and I have no garage at the moment so my car has been iced shut...not to mention the weather channel taunting me with "-8, feels like -33". So finally I am posting a recipe - Bacon Biscuits!!! I actually haven't even tried them yet because I am typing this as I bake, but if they taste anywhere near as delicious as they smell, we are all in for a treat.

I saw this recipe on a blog I stumbled upon, The Urban Poser. After reading a few sentences, I realized she was a yogi, which made her blog name a pun. We'd be best friends for sure. I made a few changes, but I think she would like them :).

Oh you just want the recipe and not my rambling? Ok fine. 

Smoked Cheddar, Scallion, and Bacon Biscuits
(gluten free and dairy free/paleo if you skip the cheddar...Mike is asking why anyone in their right mind would skip cheese...some of us have allergies, Mike)

Gather these things:
   Dry
- 1/2 cup coconut flour
- 3/4 t baking soda
- 1/2 t salt
   Wet
- 1/2 cup of melted coconut oil (I actually used the 1/4 cup of bacon fat that my bacon strips produced mixed with 1/4 cup of coconut oil)
- 1/2 cup pumpkin
- 1 T apple cider vinegar
- 3 large eggs
- 6 strips bacon
- 1 large scallion, diced
- 1/4 - 1/2 cup of grated cheese of your choice. I used smoked cheddar to stick to the cowboy-ish, smokey, bacon-y theme.

Directions: 
- Preheat oven to 350* F. Line a baking pan with parchment paper (or grease).
- Put a skillet on the stovetop and heat to medium high. Add bacon strips and cook until crispy.
- Collect bacon fat. Add enough coconut oil to it to make 1/2 cup of oil total. Oil should be in liquid state.
- Combine dry ingredients and mix. Add oil, pumpkin, vinegar to dry ingredients and mix until smooth.
- Crack eggs into batter, one at a time. Mix batter in between each egg added.
- Chop bacon into bits; add to batter, stir.
- Stir in scallions and cheese.
- Make into biscuit shapes, but keep the batter tall when dropping onto baking sheet, don't flatten them out. I made 10 biscuits but feel free to make them as big or small as you like! 
- Bake for 12-20 minutes. The bigger your biscuits are, the longer they will need to cook, but keep a careful eye on them, you don't want hard biscuits!
- Eat!!

First get that bacon going! We have this new pan by T-Fal that doesn't need any oil and is still non-stick...and it actually works! I feel like an infomercial right now, but I swear I haven't needed to add any extra oil to when I cook and it works perfectly. A life savor when it comes to my omelets in the morning. I highly recommend it.


Once your bacon is done, set aside the bacon to crisp up and drain the oil into a measuring cup and add enough coconut oil to make it total 1/2 cup.

My bacon fat was hot when I added the coconut oil, it melted right away and took out the extra step of melting my oil...love when things like that happen.

Then put your dry ingredients in one bowl to mix together, and your pumpkin, oil, and apple cider vinegar in another bowl. 

 
Bacon fat smells so good, I wish I could cook with it all the time. Smell-o-vision would be really useful right now.

When mixed together, your batter should look about like this.


Then add the eggs, mixing together after each one.


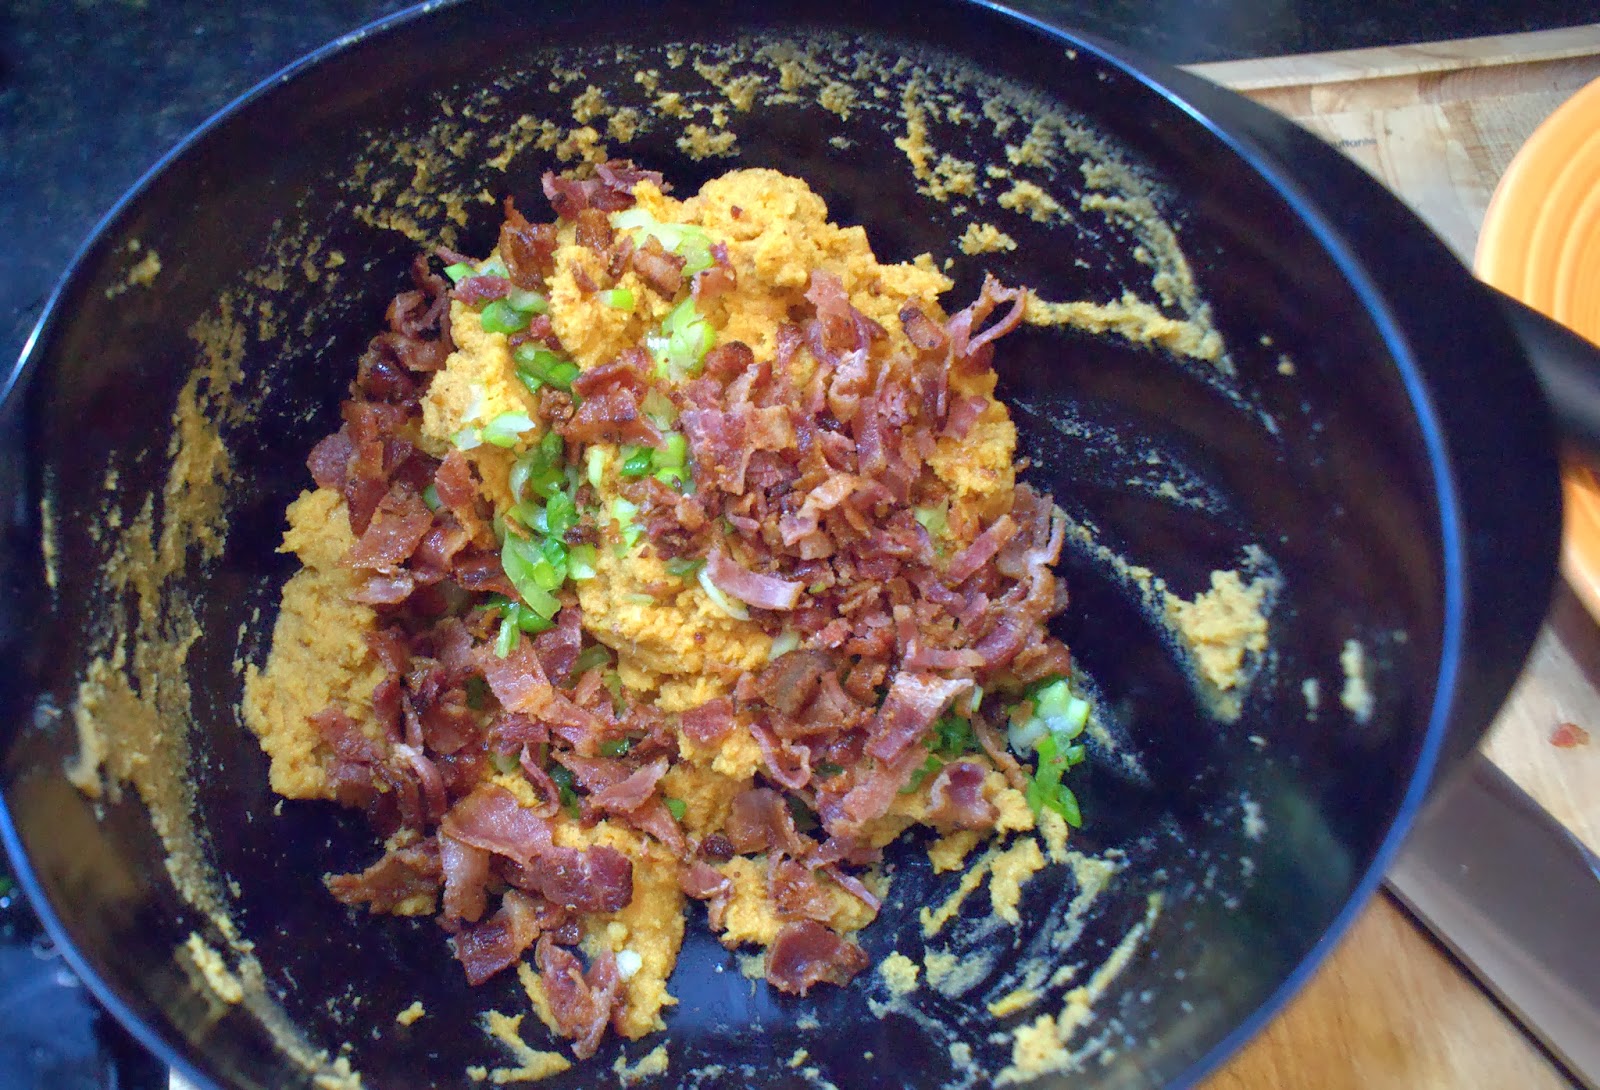
And now for the add ins! Now is your chance to get really creative. I choose scallions and bacon, but feel free to use chives and cooked ham, or minced garlic and sausage....the combinations are endless!


 In go the scallions...

 And last but CERTAINLY not least, the bacon!! I could even go for more bacon next time. Did I mention I love bacon?

Now before I added the smoked cheddar, I made 2 biscuits for myself so I wouldn't die. But for the first time in a very long time, I wished I could have some cheese. Something about the smokiness of this cheese really got me. Maybe I just love smoke flavoring. Anyways, add whatever cheese you prefer, but Mike loved the smoked cheddar/bacon/scallion combo.


Drop some biscuit looking shapes onto your pan and then into the oven they go! 

Colorful little devils aren't they? 

Don't go too far away from your oven, you'll need to watch these like a hawk! Take them out when they are firm but still a give a little when you poke them. You don't want these babies to overcook, eating rocks is no fun. 

Mike came home just as they were coming out of the oven. And then he proceeded to eat them all for his dinner. I didn't even get a picture with my big camera!! Such is life I suppose :).